
You want to improve your movie collection with nice covers and wallpapers for each movie?
While watching movies you want to know the name of a talented actor?
You have an unknown movie in you collection and before watching it, you want to check trailers of it without browsing on youtube?
In this tutorial I’ll show you how you tweak your movies with nice covers, wallpapers and movie descriptions.
You may be sure, that you don’t have to look for covers and mmovie descriptions by yourself.
Kodi is able to search for it by itself automatically.
I assure that you will be thrilled by the results.
1. Prepare your video files optimally
To make Kodi able to download the proper graphics (covers, screenshots etc.), your movies have to be arranged in a certain way.
It doesn’t matter wether the movies are located on an external usb drive or on a network-attached storage (NAS), it has to be the same structure.
To detect the movie and its proper graphics and movie details, kodi verifies the folder name!
The filename of the video file is irrelevant. This means that the filename in your Folder „Avatar“ could be „blabla.mkv“ or whatever, in this case kodi will recognize everything. Then the movie Avatar will be linked to the file blabla.mkv and when you play your video Avatar later, it will start playback of “blabla.mkv”.
Therefore put all your movies in separate folders wich are named after the film title.
Spelling of film titles have to be correct so Kodi can recognize them.
Could look like this:
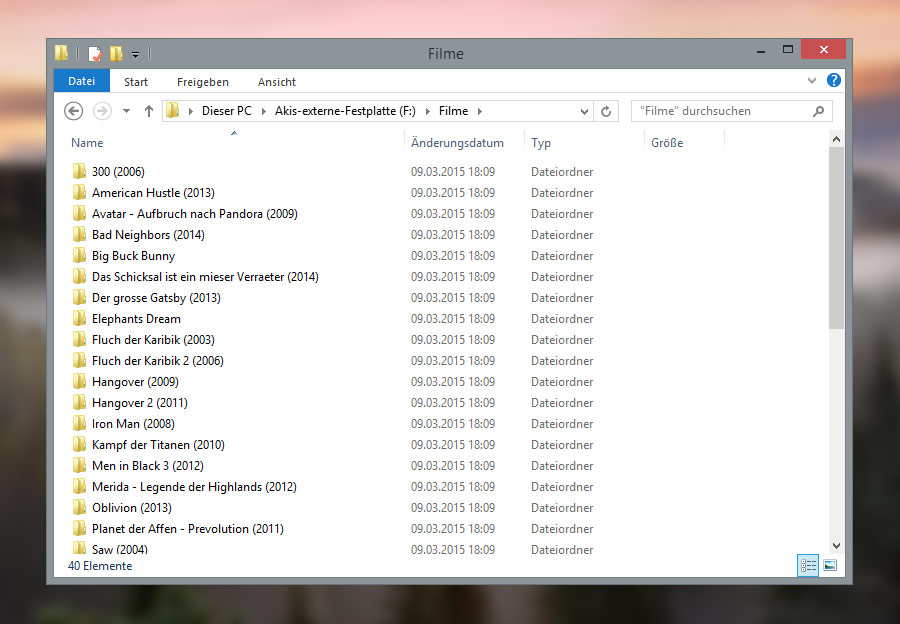
It is a good idea to write the year of release after the film title, because there are different versions of e.g. Karate Kid (1984) and Karate Kid (2015).
Kodi gets all film details from themoviedb.org. You should also visit this site to check how you need to name your folders correctly and avoid problems in film detection.
So if you search for e.g. „Avatar“, you will get some results and see how your folder for „Avatar“ has to be named and in wich year it was released.

I recommend to lookup all of your films on this site to make sure the title is correct.
2. Proper setup in Kodi
Films should be available in correct form now.
Within Kodi you look for video menu of the films. If your films are located on a network storage,you have to add them using the button „Add videos“. My films are located on an external drive in a folder named „Films“.
Important note: network sources wich use UPnp can’t be scanned, because they’re using a dynamic path. So better to use SMB or NFS to access your drive within a network.
Now it’s time to give Kodi the the information, that all films are located in the folder „Films“.
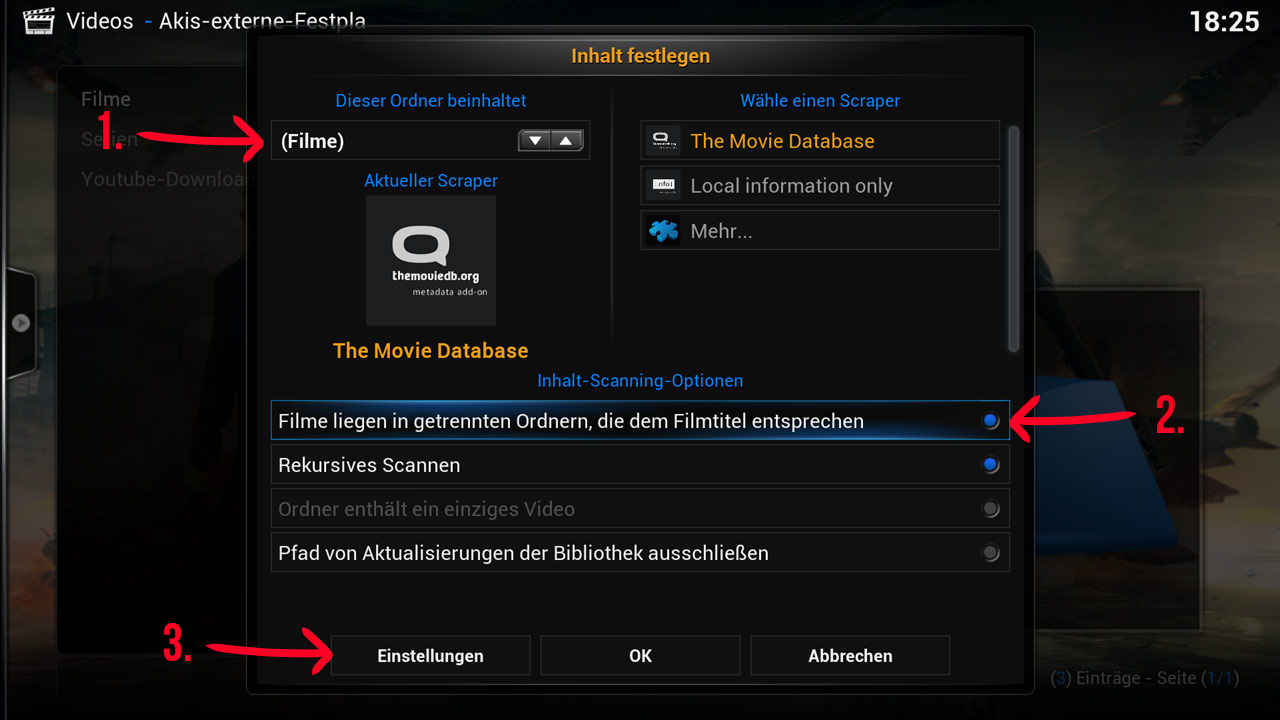
In order to do this you select the folder and open the context menu (button C on keyboard) and select „define content“.
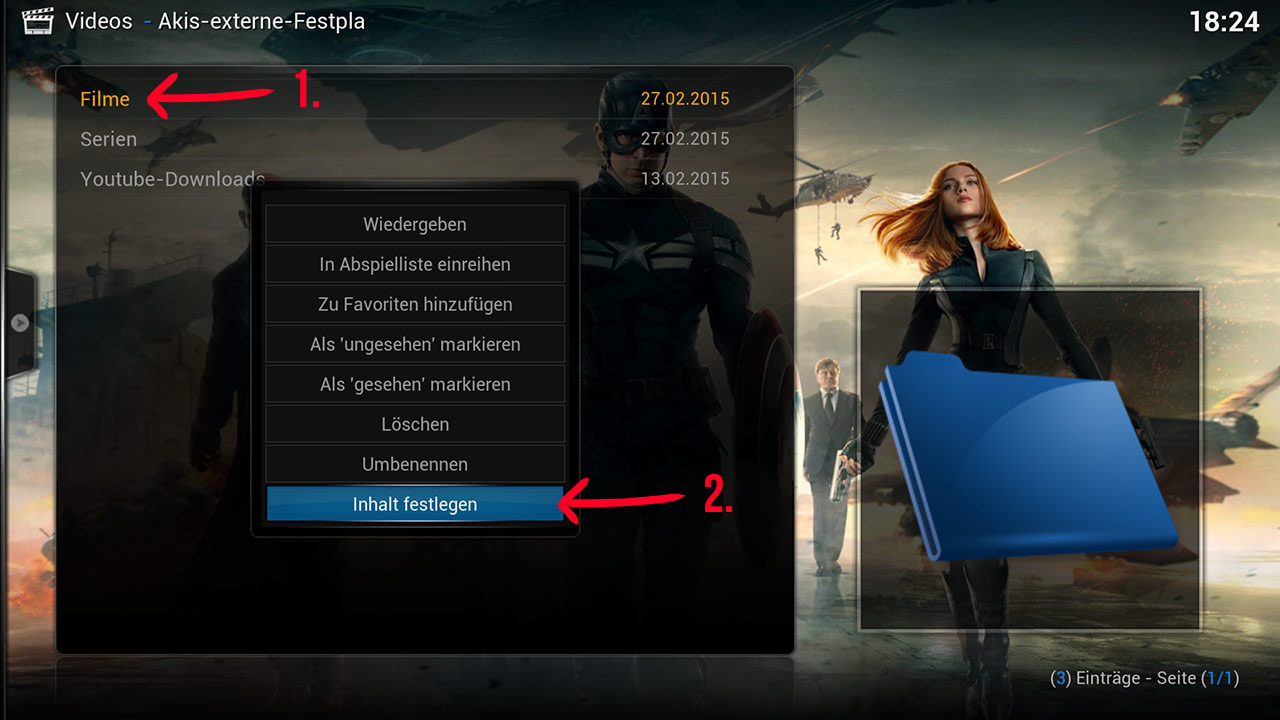
A dialog window opens. Select „Films“ (1.) in the top left and check the option „films are located in separate folders… „ (2.)
Remaining settings can be left unchanged. Just to be on the safe site compare your settings with the screenshot below.
Before you confirm on button „OK“, you should have a look in „Settings“ (3.).
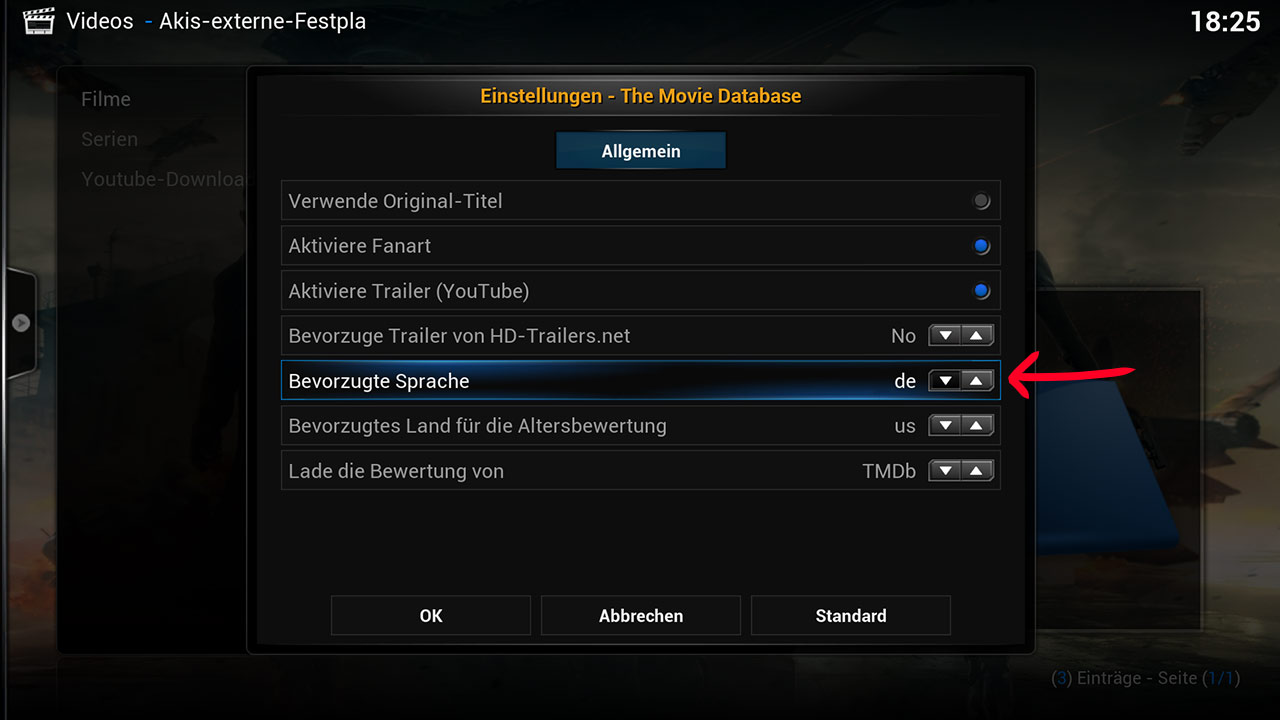
Make sure, that preferred language is set to the language you want to have for your film details. Remaining settings stay unchanged.
After you chose the correct language, you can confirm the dialogue with „OK“ and confirm the previous dialogue with „OK“ again.
Next you will be asked, if you want to update information in this folder. Because you exactly know what you’re doing, you confirm this message with „Yes“ 🙂
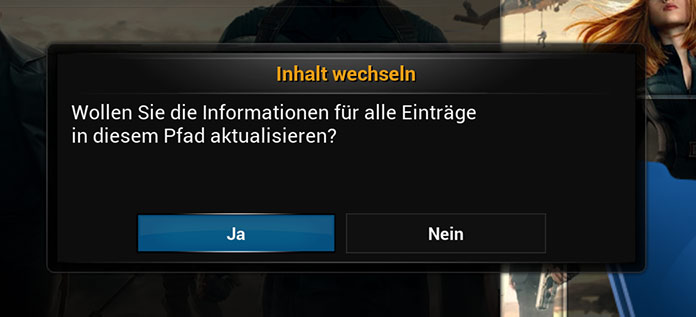
If a scan process starts, you’ve done everything right.
Now you can lean back and wait till Kodi gathered all information and graphics (covers, screenshots etc.).
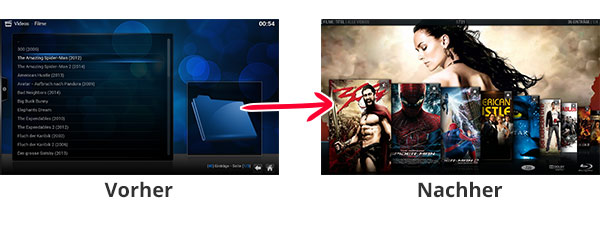
Once the scan process completed, you should see a new menu item „Films“.
Here you can find all of your films, wich now contain fancy covers, wallpapers and film details.

It is way more fun to browse in your own movie collection now, right? 🙂
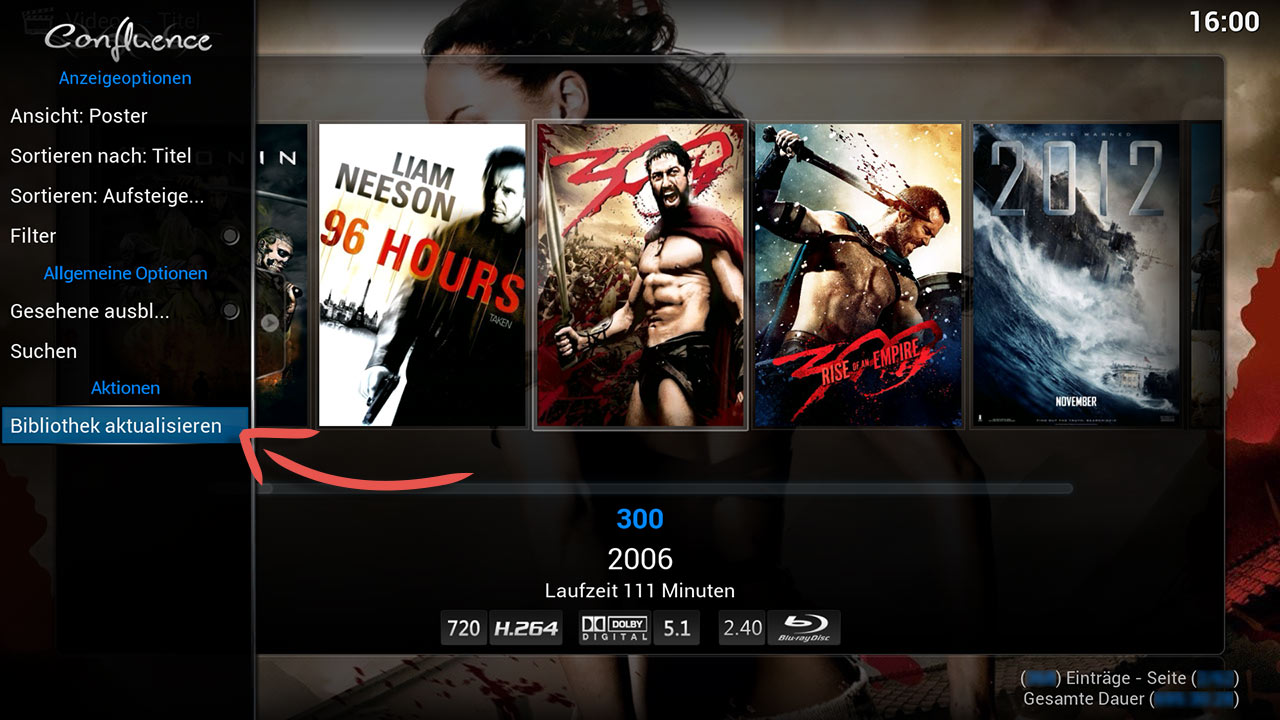
What should I do when new movies are added to the collection?
If you copied new movies to your drive and want them to be scanned, you need to update the movie library. With this option Kodi will automatically search for new films and download all information and graphics.
You can find this function in the side menu while your in your movie or series collection.
Now you press the „Up“ button on your remote control and a menu appears. Select „Update Library“ and wait a short period till Kodi recognized your new files and updated the informations.
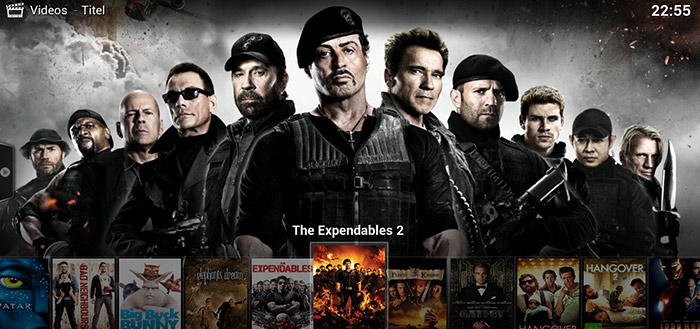
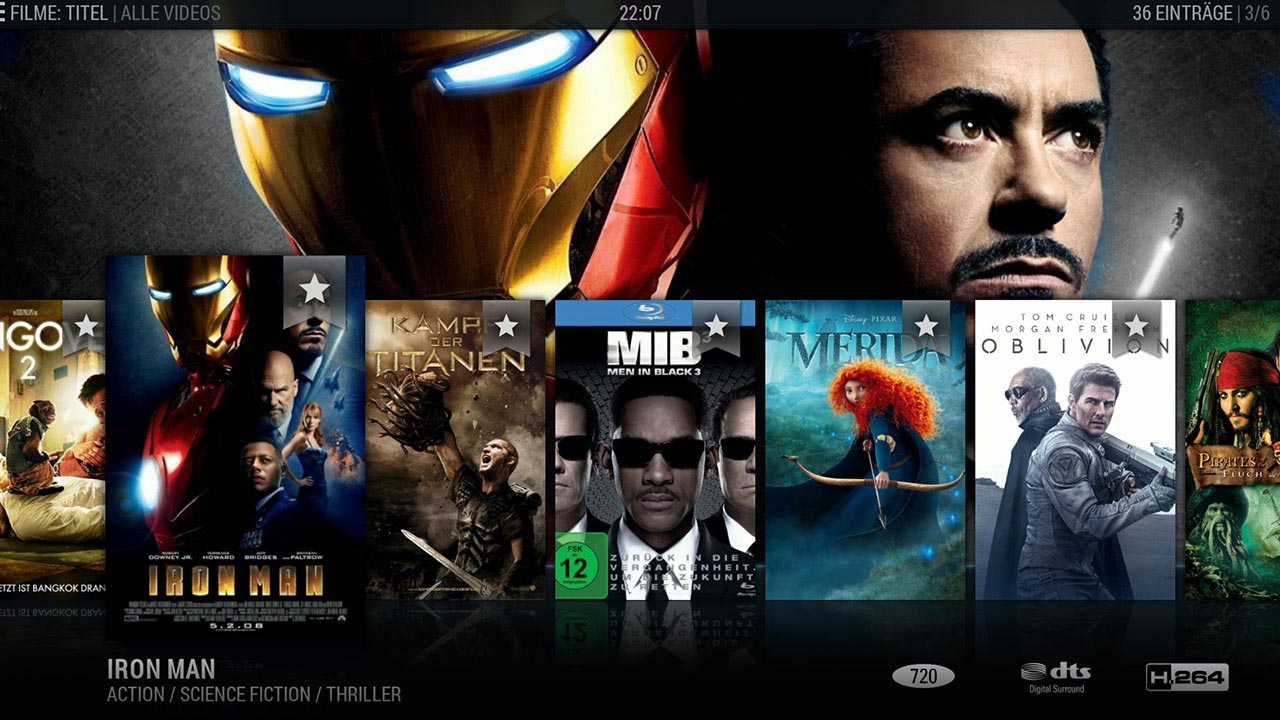
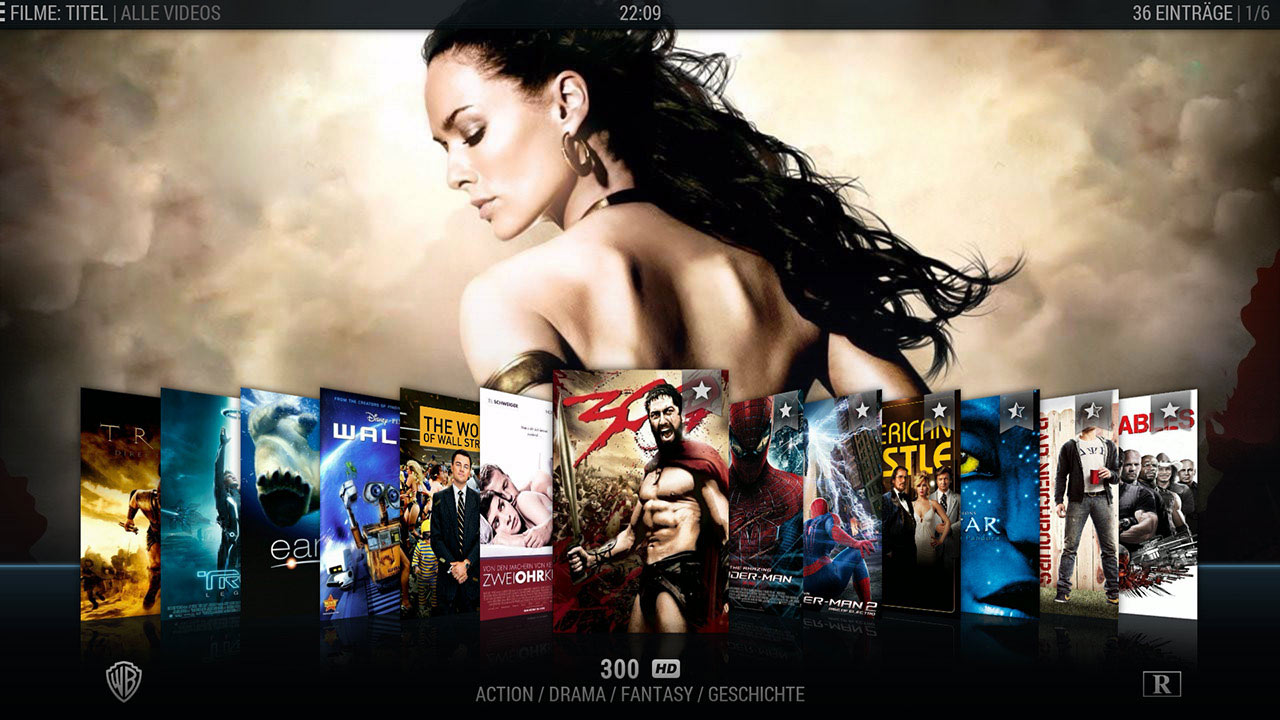
Here are some screenshots of the results.
Because the setup for series differs from movie setup, i wrote another article for you:
How to setup your series collection properly using kodi
If you have any questions or problems, I like helping you guys out in the comments.


hi, thx for your website, found some good information about my lightberry setup and her configuration file. i’ve tweak the config for a long time, and not so happy with my color. will give a new try 🙂
just a head up for the library update, at the end of your article.
i use an addon “watchdog” (http://kodi.wiki/view/Add-on:Watchdog) who check when a new file is added in your folder, and automaticaly add it to the library.
all is invisible for the end user.
Have a good day and thx again for your blog !.