

Many readers have asked me if there’s a possibility to use a switch with the Raspberry Pi 2. This caused me to write an article on this topic and show you how to do it.
Its’s really easy and can be done quick. The Raspi 2 has a built in connector for a switch already, which you can use to install a switch.
No need of any troublesome scripts, the switch works plug and play. 🙂
How does this switch work?
This is a tactical switch, which bypasses the connector and thats how the Raspberry starts. Same concept as on PCs Powerbuttons.
If you push the button during operation, it triggers a reset and the Raspi reboots.
You can turn off the Raspberry as usual in the OS.
What is required?
I used following components:
| Hardware | Recommendation |
|---|---|
| Any switch (Push Button) | US UK |
| Jumper Wires | US UK |
| Male Header Pins | US UK |
| [Optional] Heat Shrink Wire Assortment | US UK |
| [Optional] Braided Sleeving Cable | Aliexpress |
As a DIY’er you will have one or another component in your assortment already. Also, you don’t even need to solder any pins on the board, you can also solder a cable directly to the contacts. But in this case removal isn’t that easy anymore.
Instead of cable shirinks you could also use cheap isolating tape or just leave the contacts unisolated. The danger of creating short circuit is pretty low here.
Intall the switch!
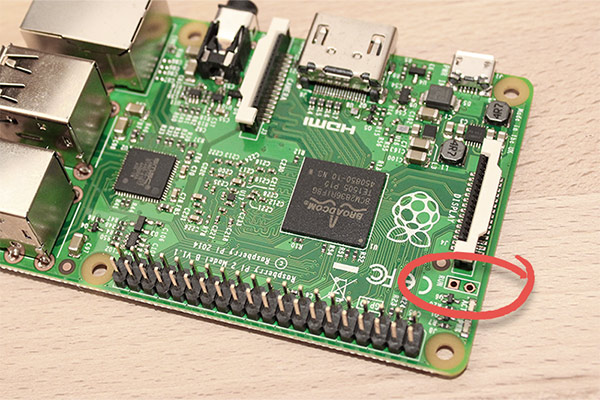
As already mentioned, the Pi 2 has a connector , where you can connect your tactical switch.
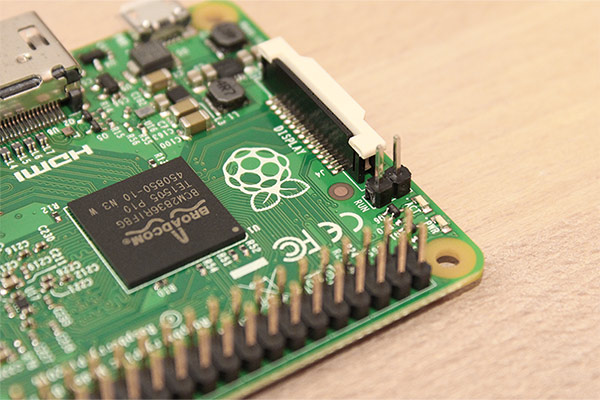
I soldered two pins to the contacts. This makes it easier to remove the switch if necessary. You’ll need to place the solder points at the backside. In case you don’t have a pin strip, just solder the cable directly to the contacts.
That’s how the pin strip looks like :
That’s pretty much it. Now you can connect your switch at the pin socket and turn the Pi on.
I had an old button from a computer laying aroundm which I used for this project. I just drilled a hole into the case and fixed it with hot glue (US/UK) from the inside.
For better appearance I sleeved the cable and fixed it with cable shrinks from each side.
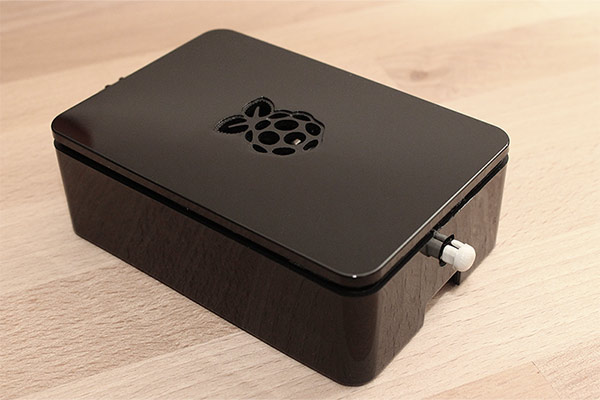
That’s how my finished project looked like:
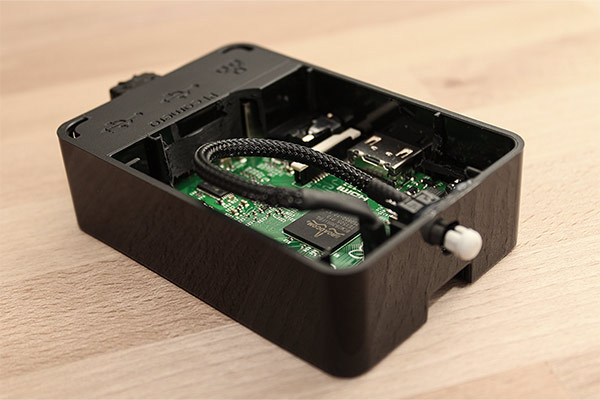
In this project I used the “OneNineDesign US/UK” for the Raspberry Pi B+. In case you’re interested in it, you’ll need to cut off one little plastic corner in the inside to use it with the Raspberry Pi 2.
To apply a switch to it, you need to remove some more plastic in the inside again.
In case you prefer to buy your stuff on ebay, i created an extra list with my recommendations:
| Case | Recommendation |
|---|---|
| Switch (Push Button) | US UK CN |
| Jumper Wires | US UK CN |
| Male Header Pins | US UK CN |
| Plastic case (Black slim) | US UK CN |
| [Optional] Heat Shrink Wire Assortment | US UK CN |
| [Optional] Braided Sleeving Cable | UK CN |


hello! thx for your hack! where are those 2 holes located on a rpi3 pls?
any specs for the button pls? in terms of voltage or amps? as i want to have it with a led backgroud…
thx