

Actually the Raspberry Pi 2 has enough power due to its 900 MHz quard-core processor. However, I had a burning interest in getting the maximum performance out of the Pi 2.
In this article I will push it to the limit to find out where the upper limit is. Also, I provide a Howto and recommendation for save overclocking, without taking any risks.
Test environment was my media-center Kodi by OpenELEC.
You can find pre-prepared config.txt files in the Download-Section, which you can use.
Preparation
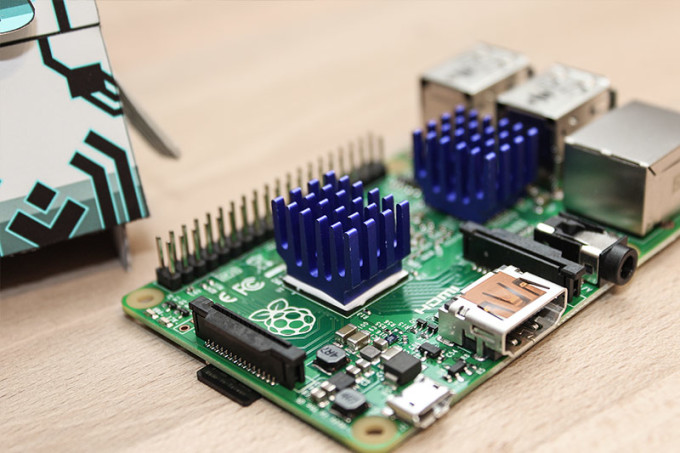
For getting the most out of your Pi 2, you need efficient cooling. That’s because heat development increases due to voltage increase.
To be on the save side, i recommend an efficient cooling solution.
I used some Zalman heatsinks, which i had laying around along with thermal adhesive to glue them on the Pi.
A good and cheap solution would be e.g. this heatsinks.
It’s important to put a heatsink on LAN & USB- controller chip, the voltage transformer chip hasn’t to be cooled because it is constructed for high temperatures.
At this point it has to be mentioned, using a case is counter productive when Pi is overclocked, because in it heat accumulates instead of escaping.
So run your Pi bare or build a small fan into the case.
How to overclock the PI 2?
That requires to edit some entries in config.txt file. The easiest way to do this is to connect your micro-sd card to your PC using a card reader and edit the file with a text editor.
I recommend Notepad++ or Sublime Text 2 .
Next you open the config.txt file and go to line 53, where you can find following entries:
# arm_freq=700
# core_freq=250
# sdram_freq=400
# over_voltage=0
Remove the hash (#) before that entires and then adjust the values.
Explanation of terms:
- arm_freq = processor
- core_freq = graphic core
- sdram_freq = main memory
- over_voltage = voltage
Recommended overclock rates:
Settings for 1GHz
arm_freq=1000
core_freq=450
sdram_freq=450
over_voltage=2
100 Mhz more on all 4 cores and more power for graphics core and memory.
Great boost, which your Pi should handle without any problems when proper cooling is provided.
processor heated up to 45° Celsius in my test environment, so everything in green range. Throttling automatically occurs above 85° Celsius.
Settings for 1,1GHz
arm_freq=1100
core_freq=500
sdram_freq=500
over_voltage=6
I can only tell it out of my own experience and cannot assure, that this with this values your Pi 2 runs stably. Thats because every CPU runs different beyond its default clock.
The temperature after 1 hour load was about 50° Celsius and power consumption increased by 0,7 watt compared to default clock.
But you can try it out , in worst case your PI 2 freezes and by rebooting and reducing the clock a little you can find your optimal value.
Fine-tuning
Increase graphics memory
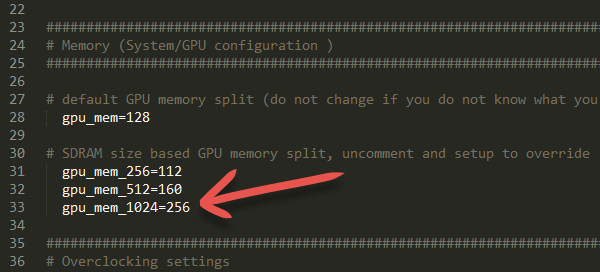
Main memory is shared by processor and graphic core. Which gets how how much depends on one value in config.txt file. Related entry is “gpu_mem_1024“.
Kodi is a graphically complex software,therefore it’s beneficial to assign more memory to the graphic unit. Luckily with 1 GB Main memory there are enough reserves to do so.
By default there is 256 MB from 1GB assigned to the graphic unit. I recommend to increase this value to 320MB to improve performance a little.
Look for the entry “gpu_mem_1024=256” and increase it to 320 :
Deactivating auto throttle function
When the CPU hasn’t much to do, it throttles automatically. When load increases, clock increases too.
This may lead to lags and dropped frames, because processor needs some time to adjust clocks values.
With the entry “force_turbo=1” you can prevent throttling. The processor runs under full load then.
Consider that therefore power consumption increases marginally and also that guarantee voids if something gets broken because of editing these values.
What is the limit?
At 1,2 Ghz the Pi 2 didn’t boot anymore.
At 1,15 Ghz it froze after about 5-10 minutes.
Even increasing voltage to the value “8” didn’t move me forward.
With 1,1 Ghz settings Raspberry Pi 2 runs without any problems and stable.
I stressed it by playing a demanding Full-HD movie around 2 hours.
Adittionally I took all cores to 100% load in raspbian and let it pass for 30 minutes.
Conclusion
Also like its predecessor, the new Pi 2 is simple to overclock.
It needs some time to find the best values for yourself, but luckily there is no big risk by trying different values.
Did someone of you managed to run your Pi 2 continuously at 1,2 Ghz or more? 🙂


BT