

Retro-Gaming was never that easy!
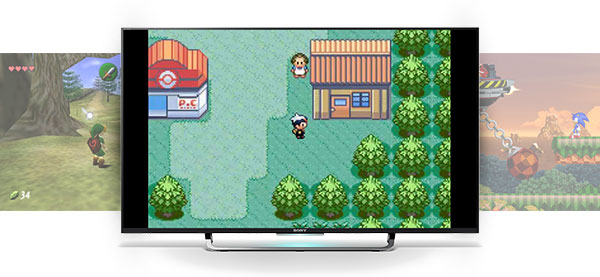
With RecalboxOS you turn your Raspberry Pi 2 into a Multi-Retro Gaming Console just in a few minutes. Play old hits like Mario World, Zelda & Sonic on your TV.
Recalbox has crucial advantages over RetroPie.
- Online Updates within the program
- Setting up Wifi is possible
- Large driver support for different controllers
- Bluetooth-Controller support
- No need of command line to set it up
In the beginning I used RetroPie, but it’s not very beginner-friendly. Many settings need to be done using the command line interface and some things are not working from the beginning, even though I’ve done everything as described in different tutorials. :/
So I gave Recalbox a try, and wasn’t disappointed. Super easy installation, super easy setup. No stress with command line interface. All settings can be made easily within the program. After 10 minutes I could play the first game using my PS3 controller.
In this tutorial I’ll show you how to install and set Recalbox OS up. 🙂
What is required?
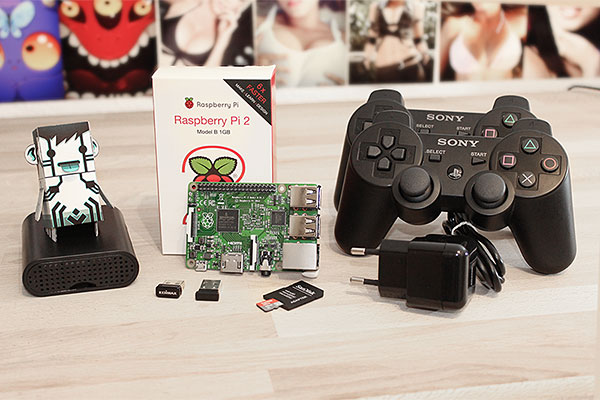
| Hardware | Recommendation |
|---|---|
| Raspberry Pi 2 Model B | US UK CN |
| High quality power supply (5V, 2,5A) | US UK CN |
| Micro SD Card (8GB at least) | US UK CN |
| Wifi dongle or network cable | US UK CN |
| any HDMI cable | US UK CN |
| USB gamepad / controller | US UK CN |
| [Optional] compatible Bluetooth dongle for PS3 pad | US UK CN |
| [Optional] any raspberry case | Goto Article |
Also, you’ll need an USB keyboard and mouse for the initial install + setup.
It’s up to you which gamepad you’ll use. As fas as I know every USB device is supported, PS3 and Xbox for sure.
I use a bluetooth dongle with my PS3 Dualshock Pads. You can find compatible ones linked above.
Howto
1. Download Recalbox
Here you can find the newest version of Recalbox. Download the file “recalboxOS-vx.x.xx.zip” ~ 340MB
After download, unzip the file somewhere on your disk.
2. Preparing SD card
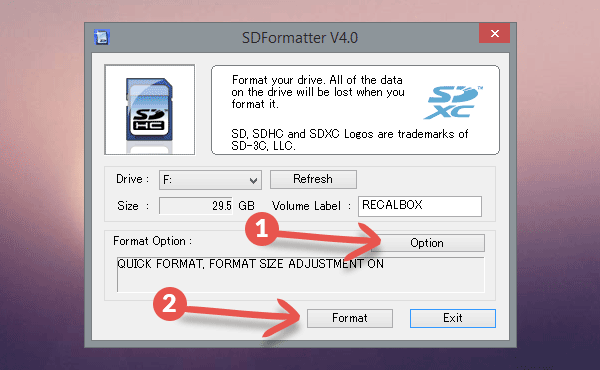
Your SD card needs to be formatted in FAT32. To format it, I recommend the tool SD Formatter. (Scrool down to the blue download button.)
Install the tool, start it and select your Raspberries SD card.
Enable the setting “Format size adjustment” in the options.
Now you can format the SD card.
Note: Iif you have a bigger SD card and the tool can’t handle it properly, you can use this tool from HP.
3. Copy Recalbox onto the SC card
After formatting , your SC card should be prepared. Now copy content of the downloaded zip file onto your SD card.
Content of SD card should look like this now.
4. Installation on Raspberry Pi
At this point you’ll need an USB mouse to start the install process.
Just tick the marked recalboxOS-rpi2 Image (1) and start the Installation (2).

When the installation is finishes, you’ll need to reboot your Raspberry Pi 2 (unplug power cable and plug it in again). Now the Recalbox OS should boot up.
5. Set up the controller / gamepad
PS3 Controller
To connect your PS3 controller, you’ll need this Bluetooth receiver.
First, connect your Playstation 3 gamepad to the Raspberry using an USB cable, then wait 10 seconds. Your controller will be paired with the bluetooth dongle.
Now you can pull out the usb cable and connect to the dongle by pressing the Playstation button.
With this method you can use more controllers at the same time.
I recommend to set up your controller in the settings, so you know where the “Hotkey- button” is located. This is very important, because with it you can switch into the menu from a running game. 🙂
USB-Controller / Gamepad
Some USB Gamepads won’t be detected automatically, so you’ll need to configure them first.
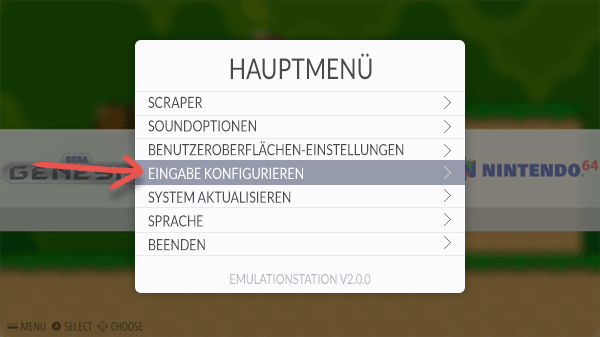
To do so, a keyboard is required to navigate within the menue to Input settings etc.
You can navigate within the Racalbox menue as follows:
- Enter = Start / Main menu
- Spacebar = Select
- Q =Back
- S = OK
Press the Enter button to get into the Menu, switch to Input settings and follow the instructions on the screen. After setup of the controller, you’ll just need to assign it to “Player 1” and you’re done.
6. Establish network connection
Easiest way to copy games (roms) onto your Raspberry is to establish a network connection.
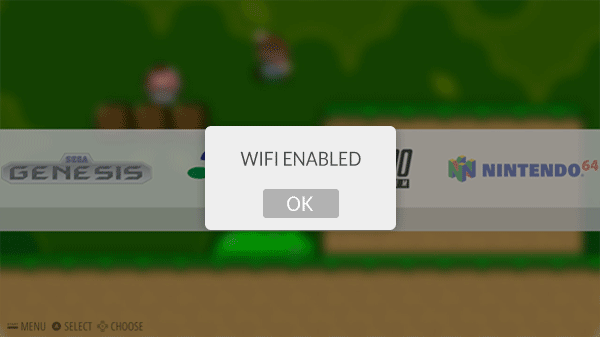
At this point you need the keyboard again, to enter your network information.
Within the main menu, navigate to “Network Settings” and enter your wifi login info. (SSID & Password)
Please pay attention to small and capital letters.
If you entered everything correctly, you’ll see a message (WIFI ENABLED) within a few seconds.
7. Adding games
Where can I find games?
Google is a great source to look for various games that are compatible with the different consoles. For instance, if you’re looking for the game Mario Kart, just enter “mario kart snes rom” and you’ll get plenty of google results. Just pick any one that works best for you.
Caution! Unfortunately on most websites, download links are often hard to find and sometimes you get redirected by advertisments. At times they also require to install unnecessary download managers etc. Roms never come in .exe format. In case you download such a file, do not open it and delete it immediately. Always pay attention to what you download, and best to scan for virus before using the rom.
Remember, you are only allowed to download games which you already own the original.
Adding games
So now you have downloaded Mario Kart as a .zip file. The next step is to unzip the file, so you’ll get a .smc file (e.g. Super_Mariokart_(E).smc), also called a Rom.
After so, copy the file onto your Raspberry Pi. This will only work if you have already set up your network connection.
You may now access the Raspberry through your computer’s network. To do so , just enter “\\RECALBOX” into the address bar of windows explorer. Alternatively, you can also use the IP of your Pi.
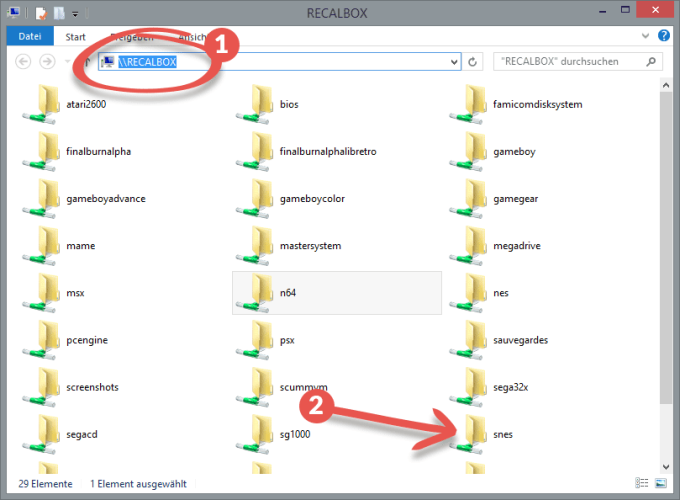
Just copy your “Super_Mariokart_(E).smc” file into the snes folder and you’re done.
Now you can finally start the game on your Recalbox OS using the Super Nintendo emulator! 🙂
8. Controls
I’ve started a game, but how do I get back to the menu?
So you’ve started Mario Kart for Super Nintendo, played your first game and you’re happy that all’s worked out well so far. Then comes the question – How do I exit the game?
During the Controller Setup, you have already assigned the Hotkey button.
Now you just have to press both the Hotkey button and Start button together to get back to the menu.
Below is a quick summary of more Hotkey commands:
- Hotkey + Y = Save state
- Hotkey + X = Load state
- Hotkey + Start = End game without saving
- Hotkey + B = Emulator settings
- Hotkey + L1 = Screenshot
- Hotkey + Rechts = Increase game speed
With this tutorial, you will be able to bring your favourite classics onto your TV. 🙂
Have fun gaming!
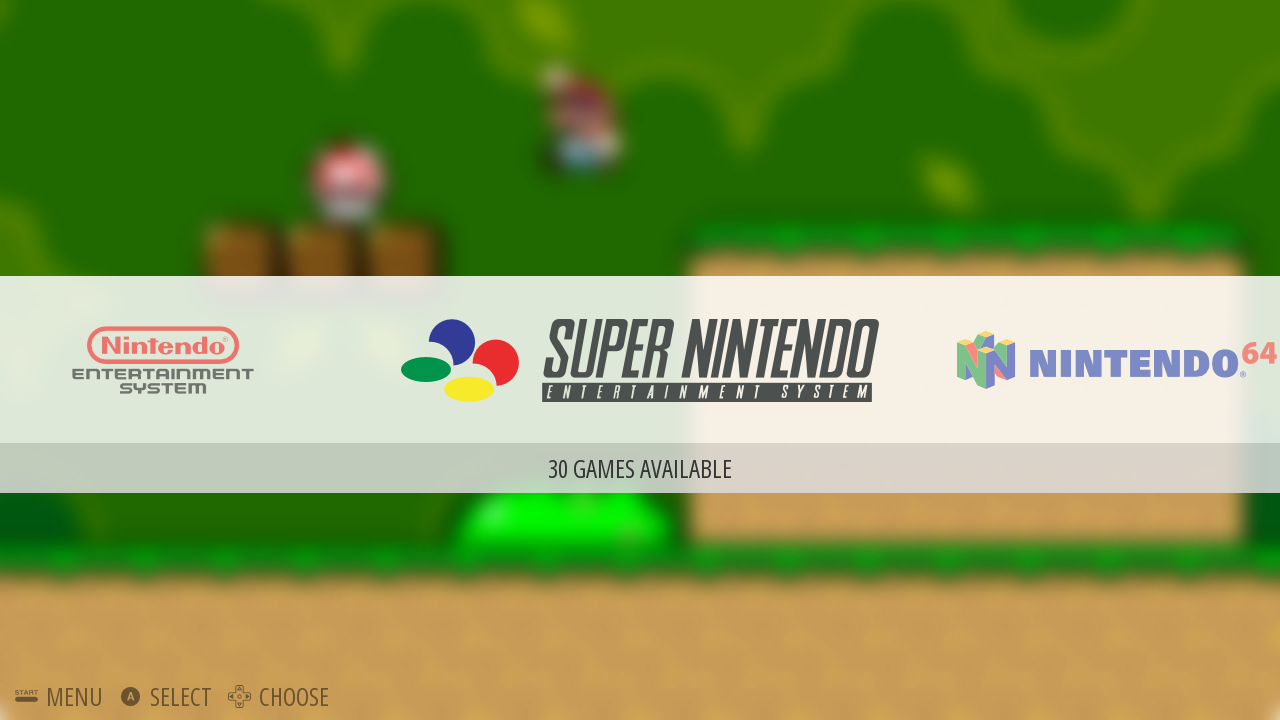
I can see neither the N64 nor the PSX emulator. What should I do?
Many people ask this question. The answer is simple – as long as there are no games in the matching folders, you won’t be able to see the emulator. For instance, if there is a game in the N64 folder, you will be able to see the game after restarting your Pi.
Results:

Tips and Tricks
How you overclock your processor or even get the full driver support for your Xbox360 controller, you can find out in the following article:
Tips and Tricks for RecalboxOS
Ps: In case you prefer to buy some of my recommendated products on ebay, here are the links:
| Hardware | Recommendation |
|---|---|
| Raspberry Pi 2 Model B | US UK CN |
| High quality power supply (5V, 2 or 2,5A) | US UK CN |
| Micro SD Card (8GB at least) | US UK CN |
| Wifi dongle or network cable | US UK CN |
| any HDMI cable | US UK CN |
| USB gamepad / controller | US UK CN |
| [Optional] compatible Bluetooth dongle for PS3 pad | US UK CN |
| [Optional] any Raspberry case | Goto Article |


Recalbox is such a pain to set up. I get no video output on CRT as I do with Retropie.
On Recalbox you need to edit a config file through Noobs to get a video output.
On Retropie BY DEFAULT the video output is switched AUTOMATICALLY to whatever video mode you have plugged.
Recalbox is easier as long as you use it with ONLY HDMI, you don’t need C64 and many other missing emulators. It is easier because it does much less with less support.
I not positive the place you are getting your info, however good topic. I needs to spend some time learning more or working out more. Thanks for magnificent information I used to be searching for this information for my mission.